

Robot Mower FAQ


Browse Categories:


FAQ
Why buy the Ambrogio Robotic Lawn Mower?
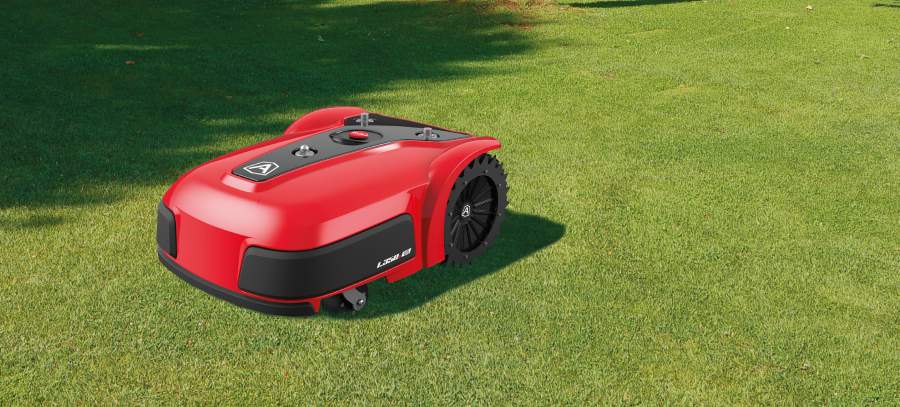
Automatic robotic lawn mowers do the work themselves. They navigate on their own and keep lawns mowed to a consistent height, such as 3 inches - always.
Although most Ambrogio robot mower models do not yet mow in grid pattern, robot lawn mowers are light-weight, preventing permanent tracks from forming. No lines at all & perfectly manicured always looks better than straight lines! Robot mowers are the best way to keep your lawn mowed - always.
How do they work?
The vast majority of Ambrogio robot mowers use a thin low voltage wire, similar to an invisible dog fence, to identify the grassy areas. The Ambrogio robot mows within the wire continuously, or as much as needed, to keep the lawn mowed to a pre-set height every day. The Ambrogio robot mower is the only brand with a robot model that does not require a perimeter wire, the wire-free L60 Deluxe+ for very small grassy areas, city lots or 1/4 acre lots (with multiple cycles).
What powers the robot?
All Ambrogio robot mowers use rechargeable Lithium Ion batteries. Except for the L60 that is manually charged by the owner, the robot recharges itself automatically by driving back to its charging station located in the lawn, or conveniently tucked under a deck at the edge of the grass.
What happens to the clippings?
One of the best things about automatic Ambrogio robot mowers is that because they mow frequently, there is only a small amount of growth to be mowed at a time. The clippings are so small, they are invisible.  They simply fall into the grass and decay naturally, providing additional fertilization for your lawn. We recommend using less fertilizer since too much fertilizer can create a thatch problem.
Ambrogio robot mowers are the solution to thatch-prone grass. Frequent mowing generates small clippings, giving you free fertilizer so less added fertilizer is required!
Are Ambrogio Robotic Mowers Safe?
We are really glad you asked this question. Ambrogio Robot is the only brand examined and accepted by the US Consumer Product Safety Commission (under its former brand name, LawnBott®). It also meets a very stringent European robotic lawn mower safety standard.
Ambrogio robotic lawn mowers are far safer than traditional lawn mowers. There are over 80,000 lawn mower accidents each year. Many involve dismembered toes or fingers and sadly, many children are hurt. However, robot mowers are safer because a human is not near the blade. Also, the blade turns off automatically if the robot is lifted.
Why buy the Ambrogio Robot Mower instead of just paying the neighbor's kid to mow?
First off, how reliable is that kid anyway? Are you sure you can count on him week in and week out? Your robot mower is always doing his job. He doesn't have a girlfriend to worry about or any vacation plans. The times the kid cannot show up, either you have to mow it yourself or the grass gets so long you end up with clumps instead of clippings. Then your kids or your dog tracks the clippings into the house creating an additional mess to clean up.
Plus the lawn will be mowed always, vs. growing long and then having clippings everywhere. Frequent cutting enables the grass roots to reach deeper for water, thus your lawn becomes healthier and more drought tolerant over time, too. There is no better way to mow than with Ambrogio Robot!
You'll never go back!
Ambrogio Robot mower owners are so happy they cannot imagine mowing the traditional way. Once you dive-in, you'll never go back! You will give your robot a name and it will become part of your family. How about giving us a call right now to learn more?
We also provide service and parts for 
Visit product pages to read reviews from current Ambrogio Robot and LawnBott® owners.
Call Now to Learn More! (847) 960-8520
Email us 24/7: info@paradiserobotics.com or paradiserobotics@gmail.com
Refine Search


Ambrogio L60 Elite 7.5Ah Robot Lawn Mower with No Perimeter Wire!
Available by Special Order Portland OR $1899.00 (7.5Ah) $1599 (5.0 Ah) Ships dire..

Ambrogio Twenty ZR Robot Mower with No Perimeter Wire!
The Ambrogio Twenty ZR robot lawn mower is a real product available now that does not require a peri..
$1,799.00

Ambrogio L15 Deluxe Robot Mower
Hurry! Only one left! DEEPLY DISCOUNTED OPEN BOX UNIT WITH FULL WARRANTY The Ambrogio ..
$999.00 $1,299.00

Ambrogio Twenty Elite Robot Lawn Mower
The Ambrogio "Twenty" robot mower celebrates the manufacturer's 20th year in the robot..
$1,999.00
Ambrogio Twenty Elite S+ Robot Lawn Mower*
The Ambrogio Twenty Elite S+* robot lawn mower is identical to the Ambrogio Twenty Elite, except it ..
$2,229.00

Ambrogio Twenty 25 Elite Robot Lawn Mower
The Ambrogio Twenty 25 Elite robot lawn mower is part of the Twenty family; slightly larger with a 1..
$2,499.00
Ambrogio Twenty 29 Elite Robot Lawn Mower
The Ambrogio Twenty 29 Elite robot lawn mower is part of the Twenty family; slightly larger in size ..
$3,699.00

Ambrogio Robot Mower for Hills - L85 Elite
On Sale NOW! Available by special order. Place your order now, we will ask our supplier to ship it d..
$1,600.00 $2,799.00

Ambrogio 4.0 Basic Robot Mower "High Cut": Premium
The Ambrogio 4.0 Basic Premium High Cut robot is the robotic mower for large 2/3 acre lots. It ..
$3,428.00

Ambrogio 4.0 Basic Robot Mower "Standard Cut" 0.25-0.6 Acres Configurable: Light, Medium, Premium
The Ambrogio 4.0 Basic robot is a durable robotic mower for typical 0.25-0.5 acre lots.&nb..
$2,699.00

Ambrogio 4.0 Elite Robot Mower "High Cut" 0.45-0.80 Acres Configurable: Premium, Extra Premium
The Ambrogio 4.0 Elite "High Cut" robot is the feature-rich robotic mower for large 0.5-1 ..
$3,899.00

Ambrogio 4.0 Elite Robot Mower "Standard Cut" 0.45-0.80 Acres Configurable: Medium, Premium, Extra Premium
The Ambrogio 4.0 Elite robot is the feature-rich robotic mower for large 0.5-1 acre lots. ..
$3,899.00

Ambrogio CUBE Elite Robot Mower for Steep Slopes
Call now for secret pricing on this model! (847) 960-8520 Cube - Robot Mower for Stee..
$6,100.00
Ambrogio 4.0 Elite Robot Mower: Premium
The Ambrogio 4.0 Elite Premium robot is the feature-rich robotic mower for large 1 acre lots.&n..
$4,628.00
Ambrogio 4.0 Elite Robot Mower "High Cut": Premium
The Ambrogio 4.0 Elite Premium "High Cut" robot is the feature-rich robotic mower for larg..
$4,628.00

Ambrogio 4.36 Elite Robot Lawn Mower
The Ambrogio 4.36 Elite robot mower is the feature-rich robotic mower for large 1.75 to 2&..
$5,498.00

Ambrogio Robot Mower L250 Deluxe w/Free Upgrade to 250i Elite!!
Upgraded Robots On Sale Now! Hurry, only 2 left in stock! The popular Ambrogio robot mowe..
$2,300.00 $2,999.00
Ambrogio Robot Mower L250i Elite 3/4 Acre "Retro" Style
The popular Ambrogio robot mower L250i Elite uses GPS locating technology to assist its navigat..
$3,899.00
Ambrogio Robot Mower L250i Elite S+ with GPS Assist
On sale now! Save big on the popular Ambrogio robot mower L250i Elite S+ uses GPS locating technolog..
$3,899.00 $4,499.00

Ambrogio Robot Mower L350i Elite for 2 Acre Properties!
On Sale Now! Spring Special! Don't miss the opportunity to get a great robot for large prop..
$4,799.00

Ambrogio L400i/L450i Deluxe Commercial Robot Mower with GPS - 5 Acres!
This is the multi-acre robotic mower you have been waiting for! Commercial quality but useful ..
Ambrogio 4.0 Basic Robot Mower: Light
The Ambrogio 4.0 Basic Light robot is the entry-level robotic mower for typical 1/4 acre lots. ..
$3,198.00
Ambrogio 4.0 Basic Robot Mower: Medium
The Ambrogio 4.0 Basic Medium robot is the entry-level robotic mower for typical 1/3 acre lots. It m..
$3,298.00
Ambrogio 4.0 Basic Robot Mower: Premium
The Ambrogio 4.0 Basic Premium robot is the robotic mower for large 2/3 acre lots. It mows up t..
$3,498.00
Ambrogio 4.0 Elite Robot Mower "High Cut": Medium
The Ambrogio 4.0 Elite Medium "High Cut" robot is the feature-rich robotic mower for large..
$4,498.00
Ambrogio 4.0 Elite Robot Mower "High Cut": Extra Premium
The Ambrogio 4.0 Elite "High Cut" robot is the feature-rich robotic mower for large 0.5-1 ..
$4,948.00
Ambrogio 4.0 Elite Robot Mower: Extra Premium
The Ambrogio 4.0 Elite Extra Premium "Standard Cut" robot is the feature-rich robotic mowe..
$4,948.00